Vermicompost is WORM compost!
WORM COMPOST?
Ah, yes……this true that worm compost is not for the faint of heart….or the queasy of stomach!
This method of composting produces the most beneficial compost around, and it can be added to both indoor and outdoor plants.
Is it right for you, and will it be part of your backyard landscaping adventure?
Let’s talk about what’s involved, and you can be the judge of that…
How does this vermicompost process actually work?
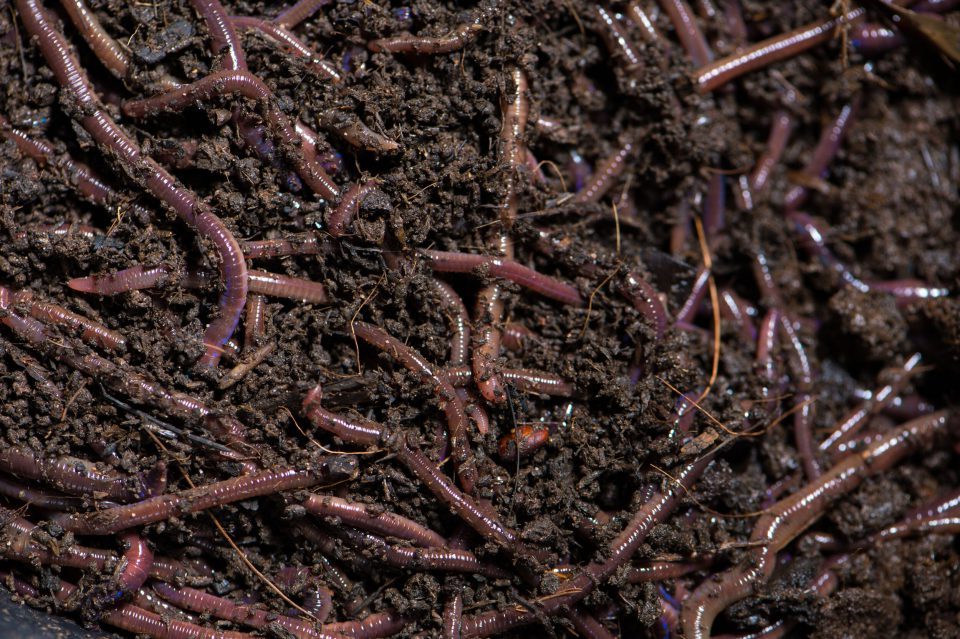
Well, the worms, which must be ‘Red Wigglers’ are a specifically selected variety designed to produce the highest quality ‘dung’ imaginable!
They are not your average garden variety worms that are available in the soil.
Nope! They are specific worms that are designed to munch away on certain types of kitchen scraps.
Where and how does one produce vermicompost?
Well, a composting bin that can be purchased, or made from scratch is made specifically to hold the worm composters.
As approved kitchen scraps are added to their bin…they munch to completion….expel the brown gold…and prepare themselves for the next helping.
So, imagine a bin of worms ready to go to work for you. Think for a moment if you will, where one of these bins might need to be housed? Obviously they can’t get too cold….or they’ll die….and they can’t get too hot….or they’ll die.
As Goldilocks once said, they need to be “just right”!
Now where in the world, would there be a good location, to keep those worms not too hot and not too cold?
Those little buggers need to be kept nice and comfy in your home with you!
Under the kitchen sink? In the basement? It doesn’t really matter as long as it’s a moderately tempered environment – approximately 55-75 degrees.
Some will say that they can be kept in the garage, or outside if the temperature is right, however this can be problematic. If they’re kept outside, there is a possibility that they can get too hot, cold, or too wet from the rain.
If they’re in your garage, same problem minus the too wet part. And if you’re going to go through the trouble of doing this, you might want to keep your worms as safe from the elements as possible.
The worms will have to be Red Wigglers. Do not try to use earthworms as they will not produce the results that you’re looking for. Best to leave those buggers out in the yard!
Red Wigglers can be purchased from a local fishing supplies store, or on the internet. Believe it or not, they do survive the shipping process!
I have ordered my Red Wigglers from what seems to be a reputable supplier, and have just finished adding them to their new home.
Let’s talk about how to make a compost bin so you can decide whether you’d like to build one yourself, or get one pre-made:
Easy to make a bin for vermicompost:
There’s a lot of info on the web these days about vermicomposting and fancy bins to go along with it, but you probably already have much of what you need on hand at your house.
Well, except for the worms…
Ingredients:
- 1 8-10 gallon Rubbermaid container with lid
- shredded newspaper
- piece of cardboard that is the same size as the opening to the container
- 2 mesh screens (window screens) that are a couple of inches longer and wider than the Rubbermaid container with holes big enough for small worms to crawl through (1/8 of an inch)
- several rocks/bricks/wood pieces, or something to elevate the worms off of the bottom of the container
- kitchen scraps – coffee grounds, vegetable and fruits scraps, egg shells, etc. NO CITRUS! The worms don’t like citrus.
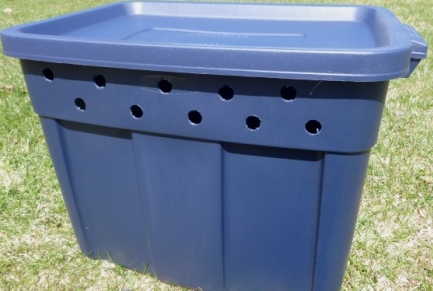
Vermi Compost Bin – Step 1
First you will want to drill holes all the way around the top of the Rubbermaid container. The worms need to breathe! 🙂
Make sure that the holes are large enough – about 1/2 inch in diameter, and that they are drilled ALL THE WAY around the container.
If you are using 2 bins (one sits inside the other) you can also drill holes on the bottom of this container. I’m only using one bin, so I won’t do that step.
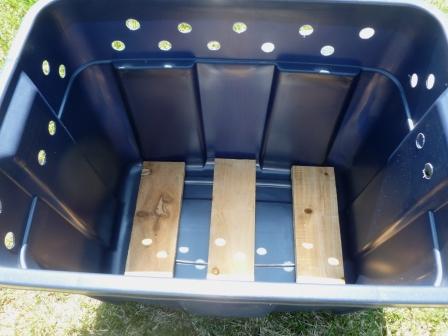
Vermi Compost Bin – Step 2
Next you’ll want to set the rocks/bricks/or wood in the bottom of the container.
This is done to keep the worms elevated from any ‘worm tea’ that falls to the bottom of the bin. (This tea is valuable, by the way, and can be poured on your garden plants!)
If the worms sit in any standing liquid, or are too wet, they could die. You want to have a moist environment, but not a soggy one.
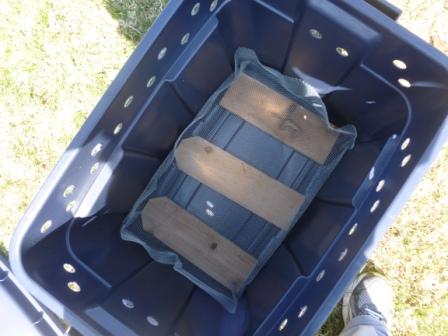
Vermi Compost Bin – Step 3
Then you’ll want to lay one of the mesh screens on top of the wood, folding in the sides just a bit.
This mesh screen will hold the worms and their food nicely.
Vermi Compost Bin – Step 4
Time to load your bin with worms and food!
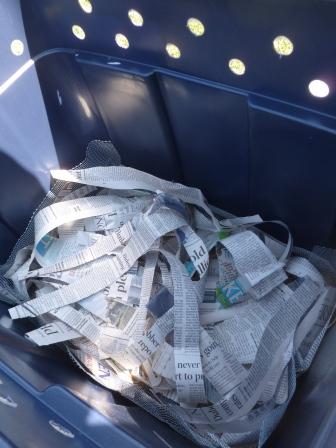
First, put down a layer of shredded newspaper. This serves as bedding for the worms, and they will actually eat through these items. The newspaper strips should be about 1 inch thick.
Make sure that the newspaper you’re adding to the bin is black and white. Do not use any advertisements or parts of the paper that are ‘shiny’. Some say it’s ok to use the non-shiny parts of the paper that have color ink, but I prefer to stick with the black and white.
Next you’ll add a layer of kitchen scraps. I added about one gallon bucket of coffee grounds with filters, strawberries, old cilantro, onions, potato peelings, and carrot peelings.
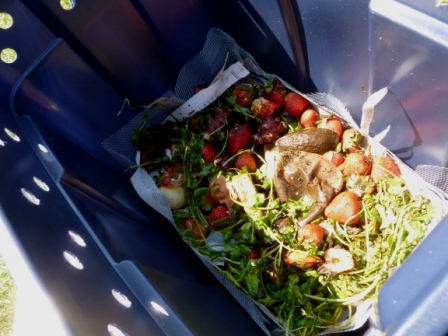
Add your worms directly on top of that.
My worms came in a gallon sized ziploc baggie with small holes in it. The worms had some soil to crawl around in, but nothing else in the bag. I added everything evenly on top of the scraps.
If you have some good potting soil around, you can add that too. I don’t know that garden soil is prohibited, but I wouldn’t add it…there could be pathogens or diseases in the soil that you’re unaware of, and it’s best to keep things a bit ‘cleaner’ in the worm bin.
Add no more than a cup or two of soil.
Then on top of the worms, add ANOTHER layer of shredded newspaper. Again, this serves as bedding for the worms which they will eat through.
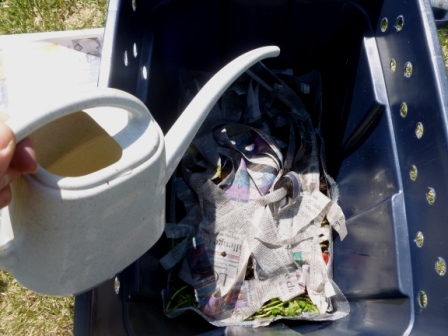
Then sprinkle the entire pile with water. The worms want to be kept moist, but not soggy. The newspaper shreds help with this as they will retain moisture better than the other material in the bin.
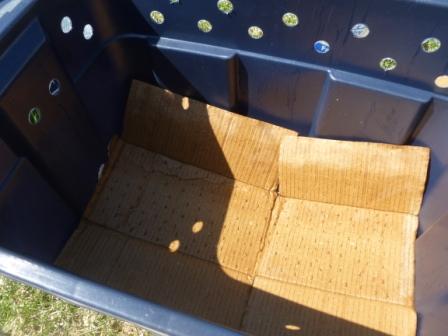
Vermi Compost Bin – Step 5
The final layer is a thick piece of cardboard that has been moistened sufficiently.
This will not only serve to keep the moisture in the pile, but it will also serve to keep the fruit flies away.
Or so I’m told….we’ll see how that one works out. I’ll keep you updated for sure!
So what’s the deal with the second piece of mesh???
Once the worms have eaten through most of the scraps and the newspaper in their bed, they’ll be ready for more, and you’ll want to collect all that brown gold they’ve created!
This is where the 2nd mesh screen comes into play.
Remove the piece of cardboard, and lay the next mesh piece on top of the already composted worm compost.
Make sure that this second screen, once loaded, lays ON TOP OF and TOUCHES the contents in the lower screen!
This is an important step because you are going to get the worms to MIGRATE UP to the second screen.
Complete the same process that you did for the first screen, adding layers of kitchen scraps and newspaper, wetting everything down. Although this time I’d make the first layer of newspaper very light so that the worms are ‘lured’ upwards by the kitchen scraps.
Because the worms have finished going through the first load of kitchen scraps, they will be hungry and looking for more. Putting a second layer on top of the old layer allows them to crawl up through the mesh to their new feeding ground.
Eventually, they will all (or most of them) will migrate up, and you’ll be able to lift the top layer off, and pick up the bottom layer of finished compost.
This will save you from separating the worms from the finished compost, and will hopefully decrease the amount of mess you have to deal with.
Then put the new screen back on the bottom of the bin, and use your finished compost as you’d like!
The finished compost is rich in nutrients, and is a super ingredient for plants!
Now that you know what’s involved in building your own bin, you may find that buying one already made is a better option for you.
I completely understand!

This is the one that they have at the Horticulture Club at my college!
This fancy gadget works really well, and does encourage the upward migration that you’re going for with the bin and mesh screens. There is also a spigot to collect all that precious worm tea easily and effortlessly!
If you get this or something similar, the only extra purchase you should have to make is for the Red Wigglers.
Redworms can be purchased from a local fishing supplies store, or online, and will reportedly stay in the box as long as they are fed.
My advice to you? Don’t let those babies go hungry? 🙂
I have purchased my worms from Wiser Worm Farm. (This site does not receive any commission for referrals to the Wiser Worm Farm.)
You’ll have to see how long it takes for your worms to go through their food. Initially, the process will be a bit slower as the worms have not yet multiplied, and are doing the best they can.
Check your bin at least every couple of days to make sure it’s moist enough and has enough food. The first load of compost will take a couple of months to complete.
Once it’s done, you can add the vermicompost to house plants or in the garden. Add about 1/2 to 1 cup of worm compost around the base of the plant, and work lightly into the top of the soil.
Enjoy the journey with your new gardening companions!
Update on my vermicompost adventure!
Well, my little red wiggler friends and I have encountered our first problem….there is soft, white, fluffy mold growing in the bin.
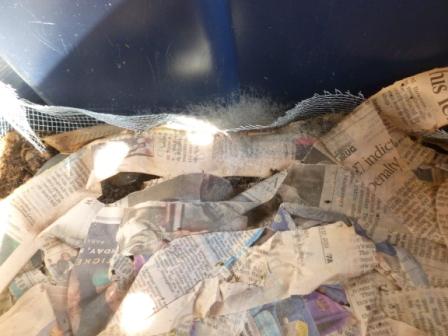
See it?
That means that there’s not enough air flow, and things have gotten TOO moist.
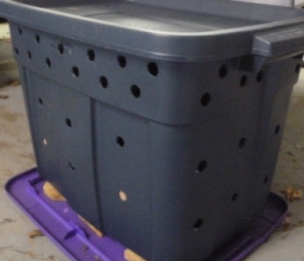
So, I’ve moved the bin out to the garage (temperatures are low, but it’s ok in there) and drilled more holes around the center of the bin and along the bottom.
I then placed the container on top of the lid of another container, so the air flow could be at a premium.
I really didn’t want to have this extra ‘bottom’ bin, or tray, but there was no option with the overly moist environment.
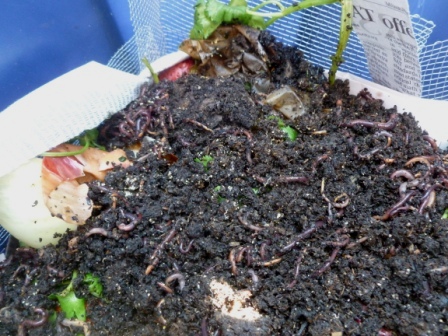
Since I’ve done this the worms are much happier, and they are vermicomposting at a fast rate! They are getting fatter by the day!
I’ve looked through some of the spoils with the worms, and I’m noticing that the bigger chunks of fruits and veggies are not getting eaten as fast, while the smaller items are disappearing steadily.
They are particularly found on coffee grounds!
Also, the newspaper that I have laid on top of them and the compost is left untouched, while the newspaper underneath seems to be getting eaten.
What I can surmise from this is, mix in a few shreds of newspaper along with your compost and feed to the worms. Also, keep the scraps as soft as possible to quicken the digestion process.
I’ll go in again in a week or two to see their progress!
To be continued…..